Step 1- Set up Single Sign On for EdApp in Okta
To set up SCIM user provisioning through Okta, you'll first need to set up Single Sign On for EdApp in Okta.
Step 2- Enable SCIM on the EdApp admin portal
- Access the integrations page from the admin portal then select SCIM
- Select the setup tab to reveal configuration options.
- Choose if you want to send welcome emails to users created through SCIM. Note: We recommend leaving this option off unless you use SCIM independent of SSO.
- Choose whether to delete inactive users. Note: Leaving this off will allow you to retain analytics and records for those users while those users will be moved to an inactive group in EdApp
- Click Connect to enable the integration

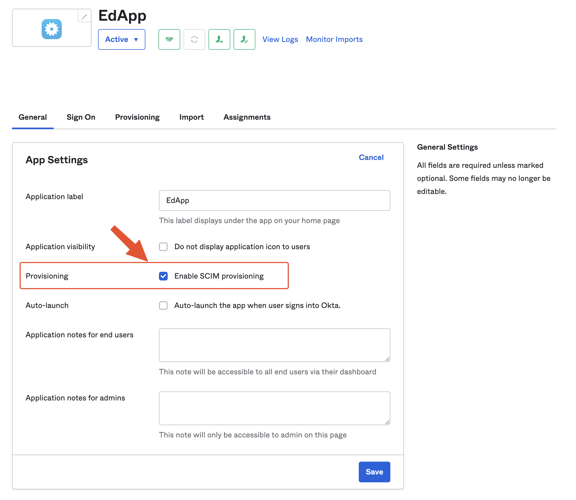
Step 3- Enable SCIM Provisioning for your EdApp application in Okta.
Step 4- Setup SCIM connection
In the EdApp application screen, click the Provisioning tab, then fill in the appropriate fields as shown below.
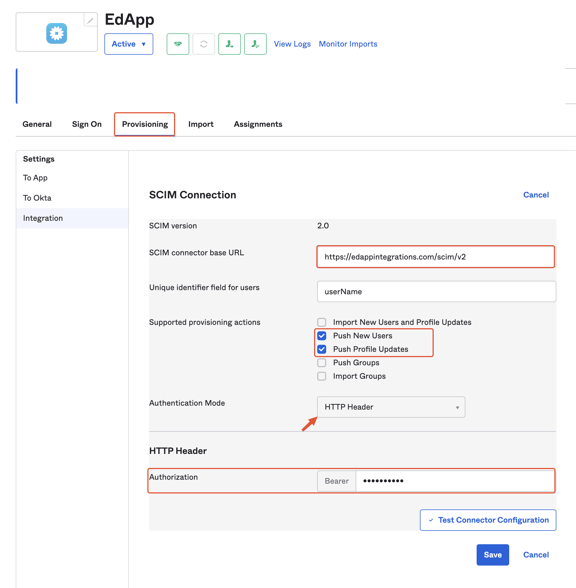
- For SCIM connector base URL, enter- https://edappintegrations.com/scim/v2
- Next, enable the options to Push New Users, Push Profile Updates, and (optionally) Push Groups.
- Select HTTP Header for Authentication Mode.
- Enter your EdApp API key in the Authorization field. You can find your API credentials in the EdApp admin portal here.
- From here, you can test your connection to ensure it works before saving.
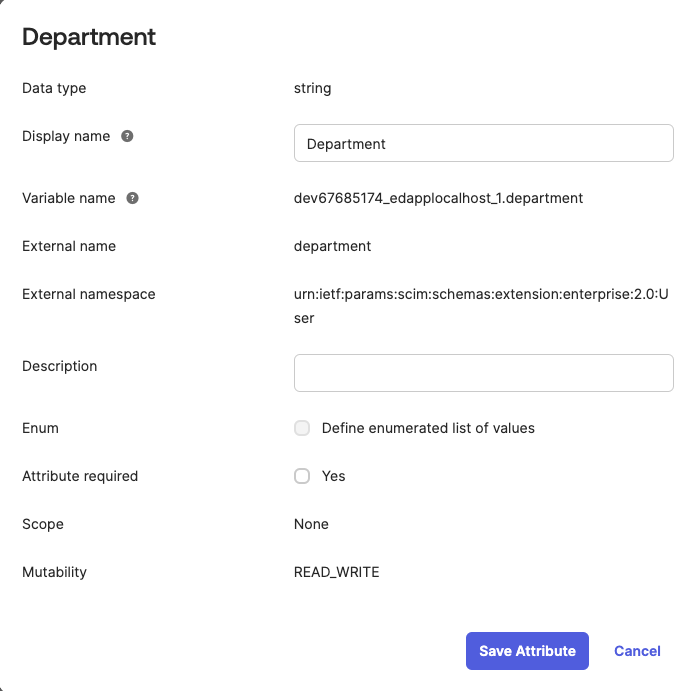
With mappings you can populate custom fields in EdApp.
For custom fields to be populated you need to make sure the target attribute points to urn:ietf:params:scim:schemas:extension:enterprise:2.0:User:{custom field name} See example below.