Why set up single sign-on?
Single sign-on (SSO) allows EdApp to identify users through an external Identity Provider (IDP).
Instead of manually registering learners, users are directed to their company identity portal, fill in their company login details, and are redirected back to EdApp. This enables a user to log in to multiple systems via a single portal. On EdApp's side, a user is internally created to match the user's details sent back from the IDP.
Ensure the person setting up SSO has admin privileges to both EdApp and the SSO provider.
Set up instructions
Step 1: To get started, login to the EdApp admin portal at https://admin.edapp.com
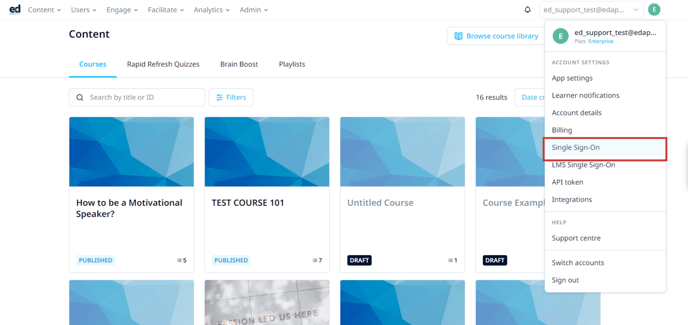
Step 2: go to Single Sign On in the drop-down menu.
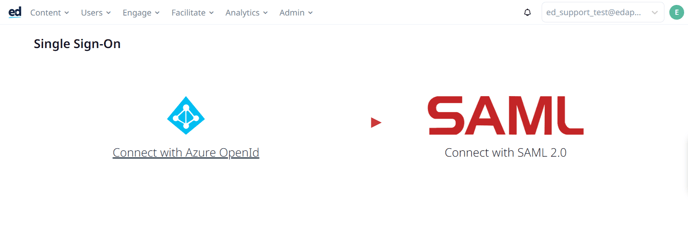
Step 3: On the next screen, click on the Connect with Azure OpenId link.
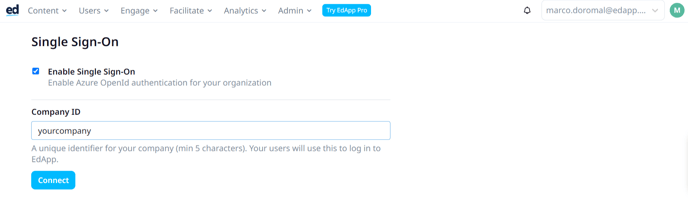
Step 4: click Enable Single Sign On
Step 5: fill in a Company ID.
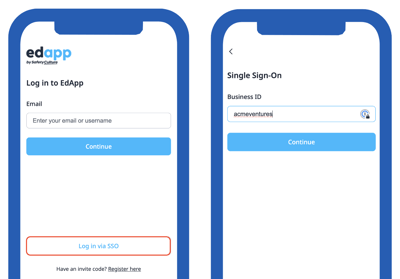
The company ID (on the admin portal) or business ID (on the learner's app) can be anything you want. Company ID and business ID are interchangeable terms on EdApp.
You must ensure this matches what you've used in your specific IDP, i.e. if you use “acmeventures” in the company ID in EdApp, make sure it's also “acmeventures” in your SSO provider.
It can be used by your learners at the login page, so it is important to choose a company ID that is easy to remember for your learners.
Step 6: Wait for the changes to be saved and click the Connect button.
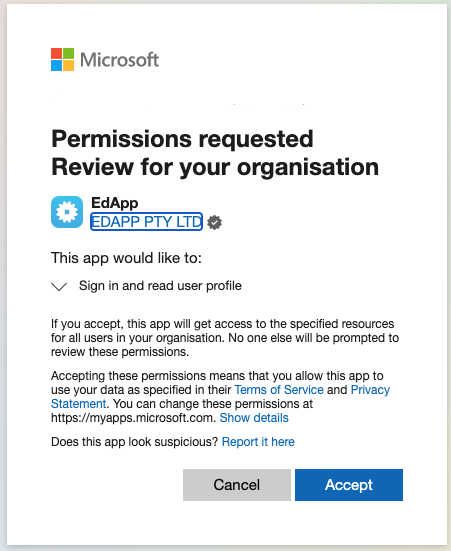
Step 7: This will redirect you to the Microsoft Azure Login screen. Please log in with an administrator account and accept the permissions request on the next screen.
Step 8: This step is to link the Azure account to your EdApp account. Depending on if you are logged in to multiple Azure accounts, another login screen might appear to actually log in to the account.
Congratulations, you have now enabled SSO with Azure.
To learn more about how learners can use SSO to login, please see Learners guide to logging in through SSO.