Contents
Why set up single sign-on?
Single sign-on (SSO) allows EdApp to identify users through an external Identity Provider (IDP).
Instead of manually registering learners, users are directed to their company identity portal, fill in their company login details, and are redirected back to EdApp. This enables a user to log in to multiple systems via a single portal. On EdApp's side, a user is internally created to match the user's details sent back from the IDP.
Ensure the person setting up SSO has admin privileges to both EdApp and the SSO provider.
Configure SSO in Google
First, let’s start with setting up SSO in Google (we’ll move on to setting this up in EdApp once this part is completed).
Step 1: Sign in to the Google Admin portal using your Google administrator account. Browse to Apps --> Web and Mobile Apps in the left-hand menu.
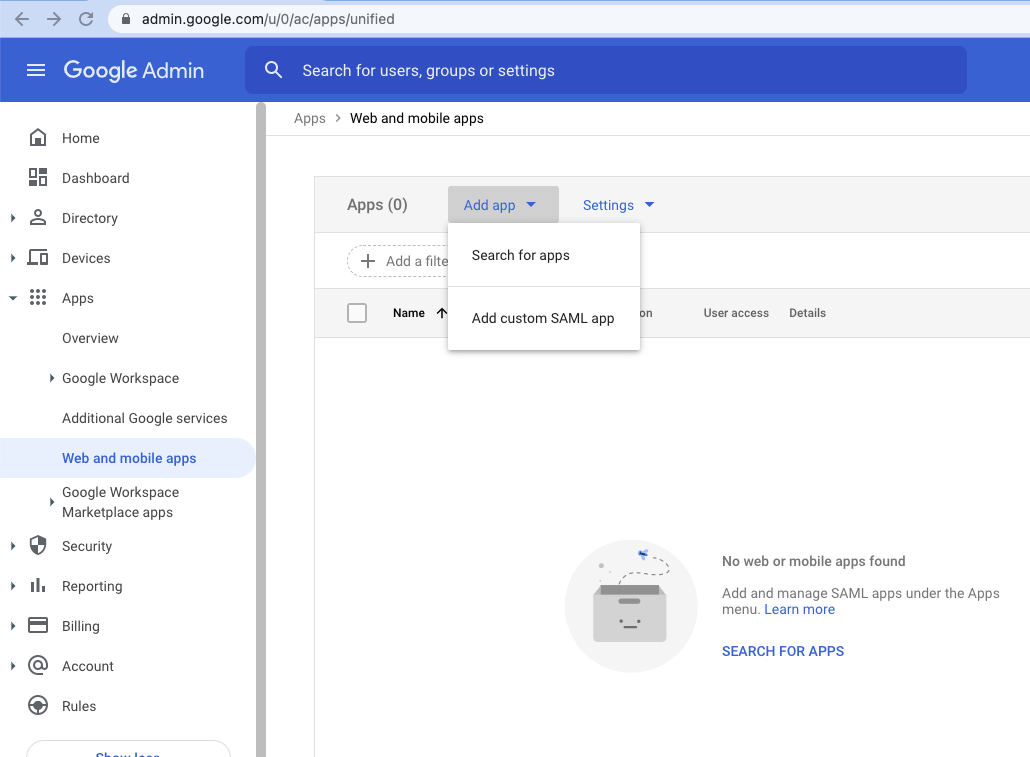
Step 2:
-
Click the Add custom SAML app and fill in "EdApp" as the application name
-
Upload the EdApp icon. This can be found here: EdApp icon
-
Select Continue.
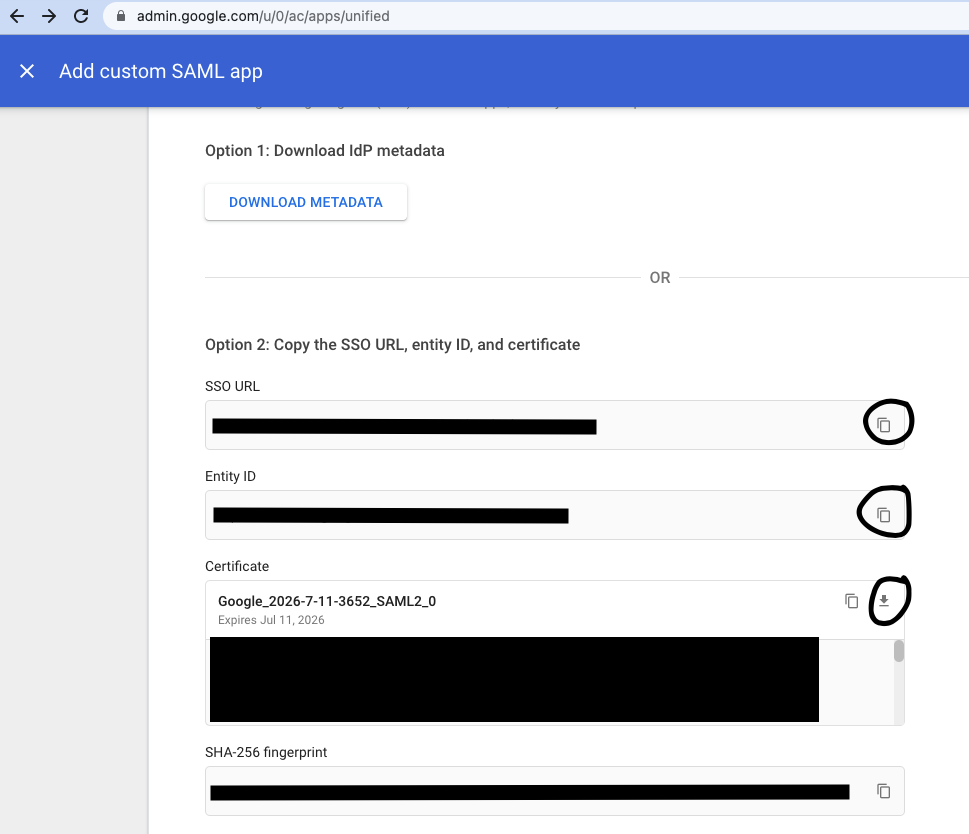
Step 3: Copy the SSO URL for future reference when setting up the EdApp part and download the certificate. Click Continue
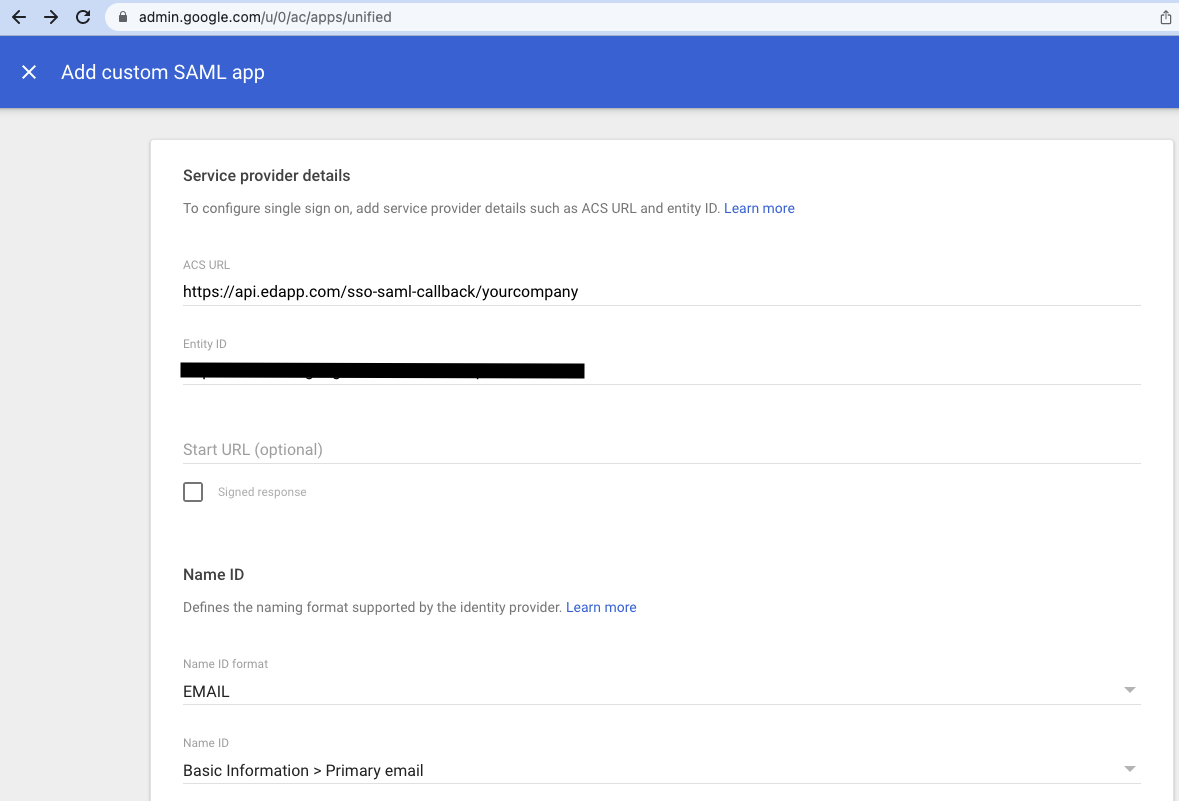
Step 4:
-
Fill in ACS URL with https://api.edapp.com/sso-saml-callback/<yourcompany> where <yourcompany> is an easy to remember identifier related to your company. Your learners will use this to to login.
-
Fill in https://web.edapp.com/{yourcompany} for the Entity ID field.
-
Choose Email for the Name ID format
-
Choose Basic Information > Primary email for the Name ID
-
Click Continue
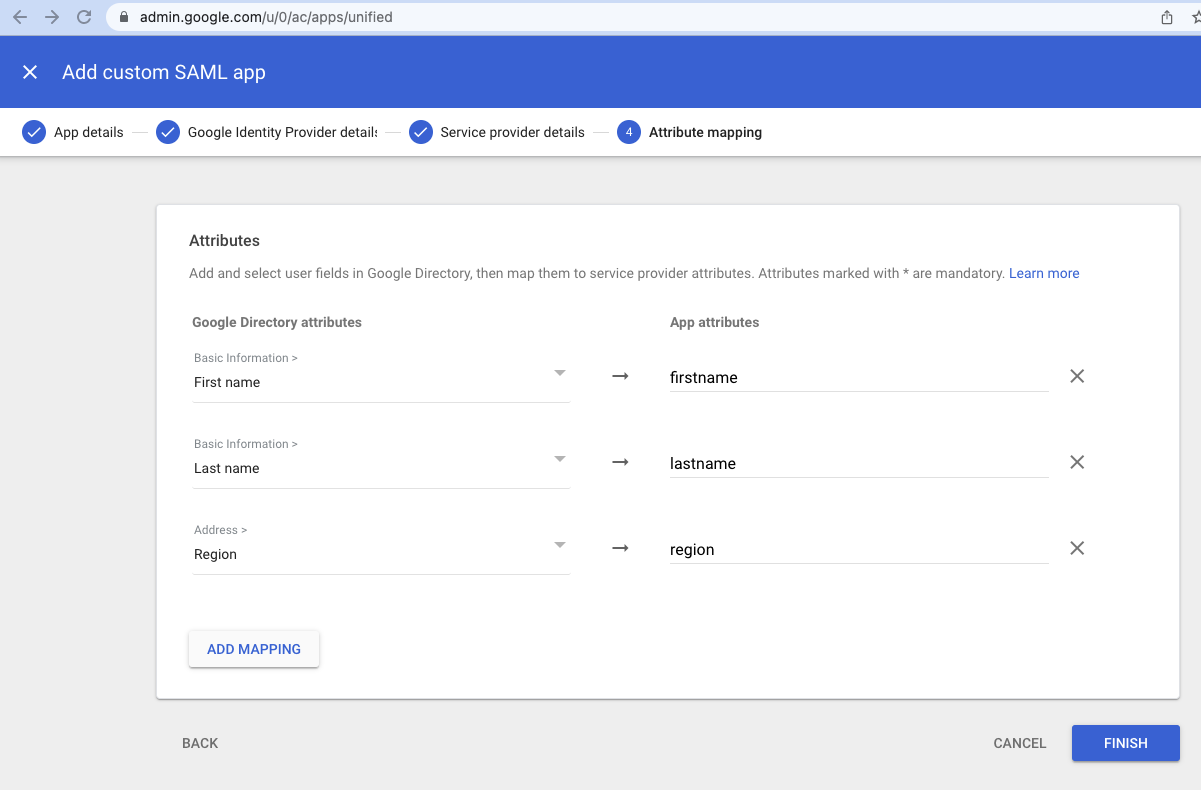
Step 5: custom fields
You can send additional information about your learners via custom fields including job title, first name, last name, active status or any custom fields you'd like. To do this, you can use attributes from the user in Google to add mappings. It is important that the App attribute has exactly the same name as the field in EdApp. The firstname and lastname fields are fields that are default fields in EdApp that can be populated without adding a custom field, the attribute has to be added though.
Click finish to complete this step
This custom field data can then be used to automate user management through dynamic user groups. You can create criteria based rules on dynamic user groups to automatically assign learners to courses based on their information. Read more on dynamic user groups here.
Step 6: Make sure to give users access to the application in User Access

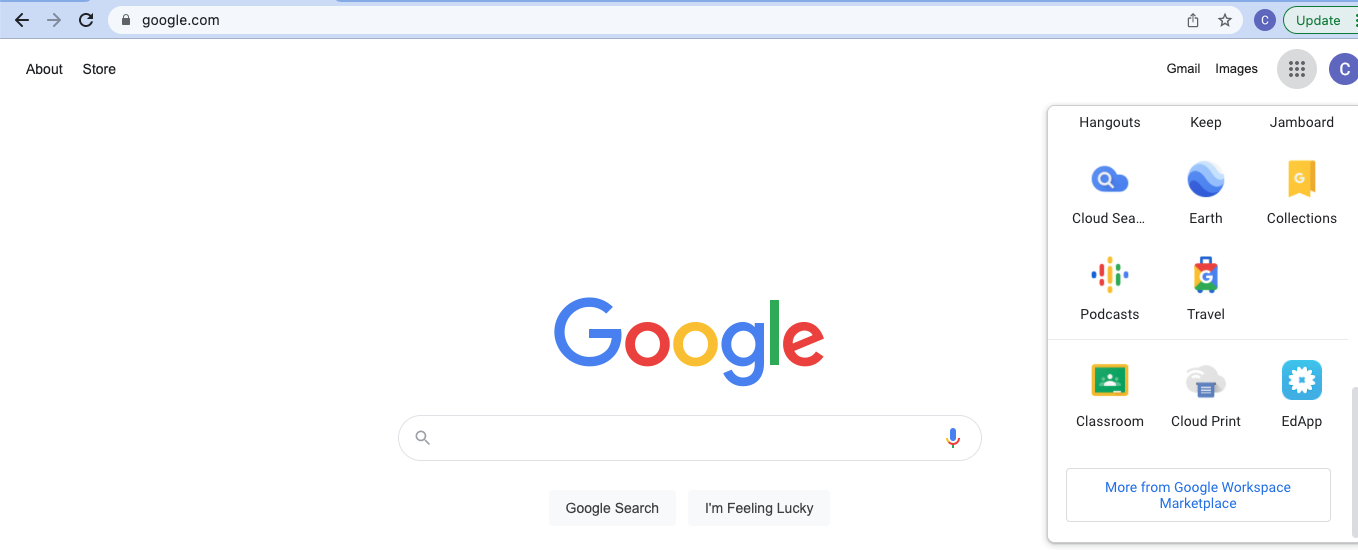
EdApp will now show up in the Google Apps menu on Google.com
Configure SSO in EdApp
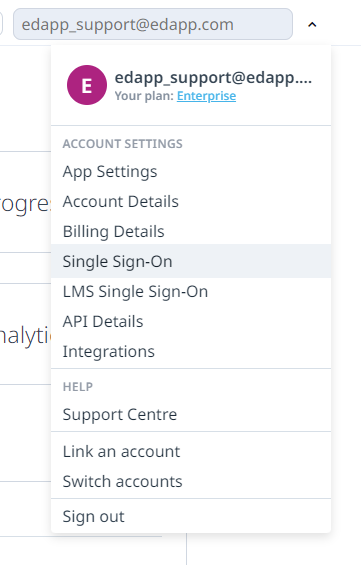
Step 7: Sign in to Ed LMS using your EdApp Admin account, and click on the dropdown arrow located on the upper right of your screen. Select Single Sign-On.
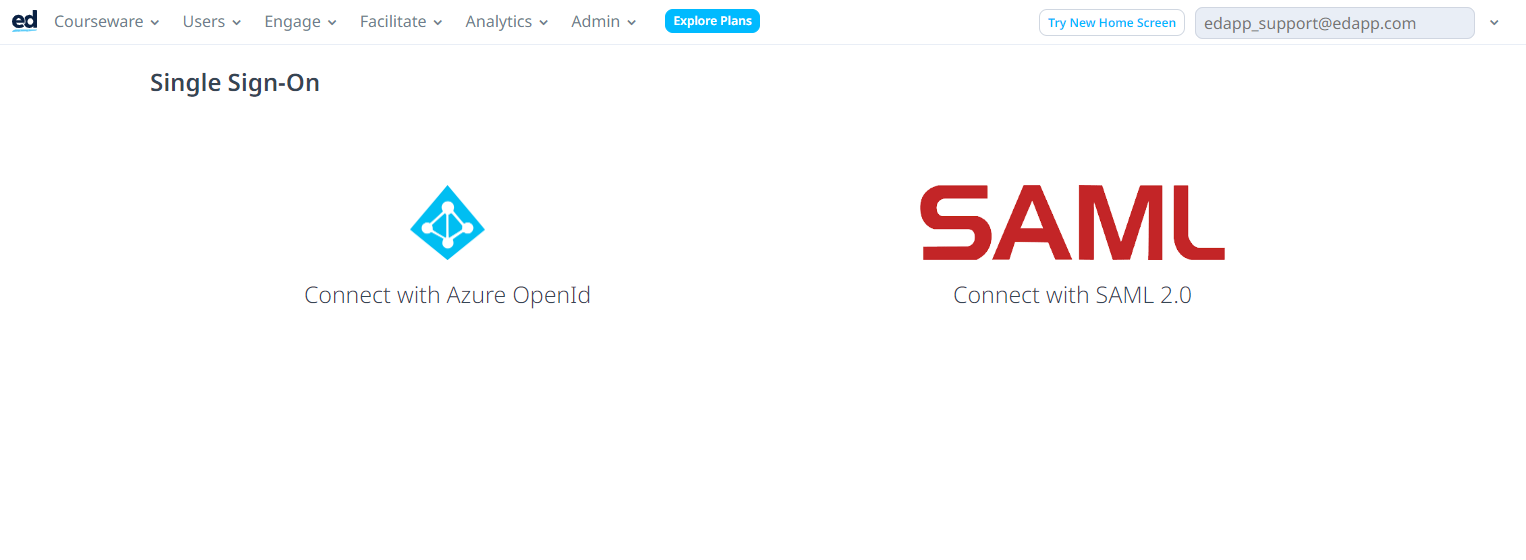
Step 7:
Choose Connect with SAML 2.0
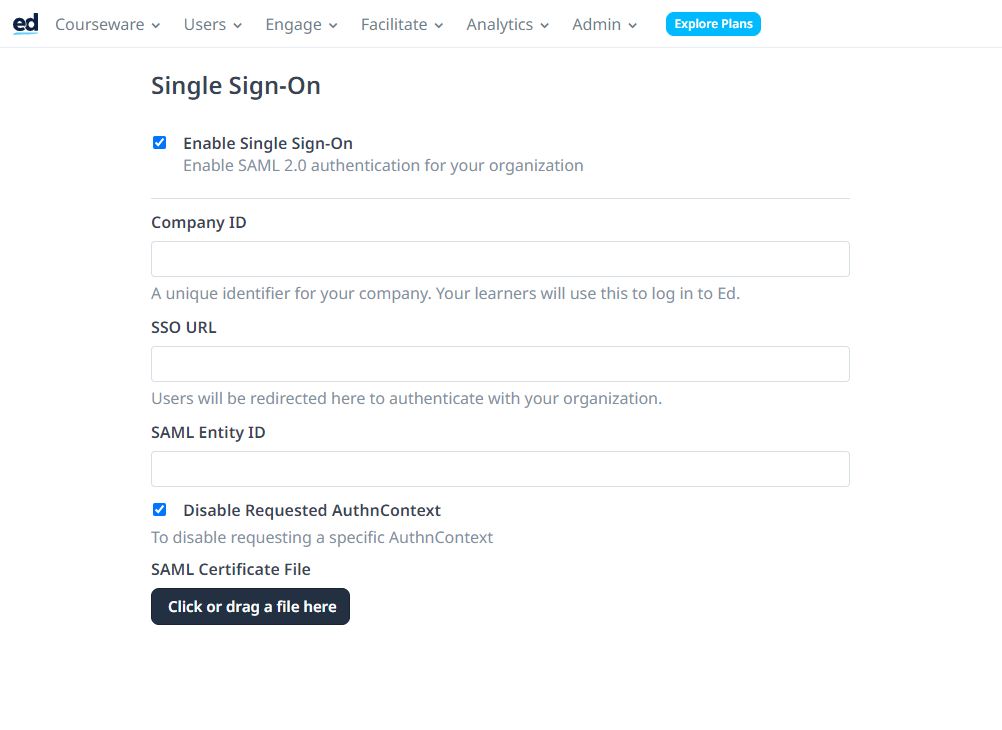
Step 8:
-
Tick the Enable Single Sign-On box
-
Populate the Company ID with the same unique company identifier as above. E.g. yourcompany
-
Populate SSO URL with the value copied from Google in from Step 2
-
Populate the SAML Entity ID with https://web.edapp.com/{yourcompany}
-
Upload the certificate downloaded from Google in Step 2
Congratulations! You’ve just configured your EdApp account with SSO, using Google. At this point, we recommend completing a round of successful testing by attempting login via SSO.
If you get stuck at any point along the way, be sure to reach out to our live chat desk, or your EdApp account manager - we’d be happy to lend a helping hand. Additionally, feel free to share this Learner Guide for logging into EdApp using SSO with your users.