Users can be invited to EdApp in a variety of ways. Inviting via email (bulk upload) is good for manually controlling who receives an invitation, or if you need to input additional information.
You can also invite users via invite links.
See guide for troubleshooting.
Content
Send individual invitations
1. Navigate to ‘Invite Users’
2. Click ‘Individual’ to invite individual users via email
This allows you to send individual users their login details via email.
A good option for inviting a few users to the platform at once. You can also customize the e-mail subject line before sending it. 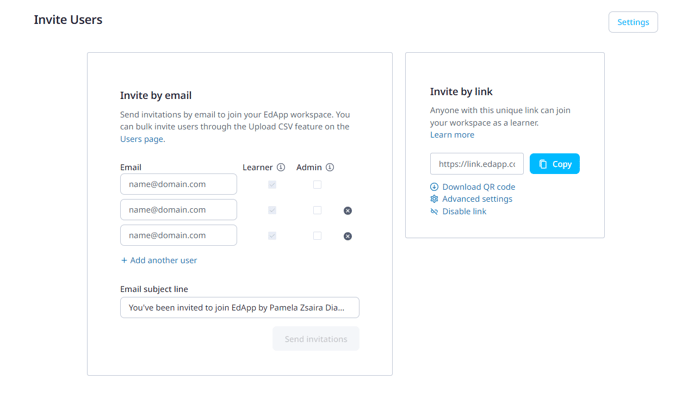
3. Inviting Admins to EdApp
3.1 On the Invite Users page, ensure that the Admin checkbox is checked and choose Send invitations when you have added your users to the invite.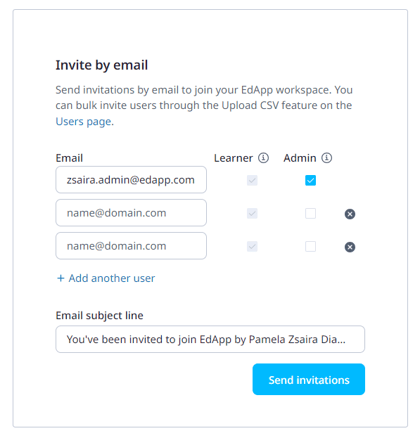
3.2 The Admin invitations will be sent to users which includes an activation link. This link is valid for 7 days, after which the invited user can request to be sent another activation link.
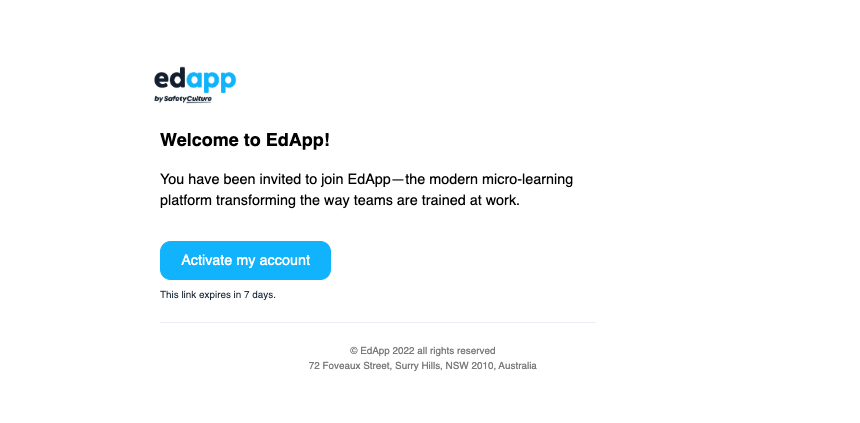
3.3 The Admin enters their details to set up their account and then has access to the LMS.
If you invite someone as an admin, they will automatically be given the learner, reviewer, and content author roles. See here for all types of permissions.
Send bulk invitations
1. Navigate to the "Users" section of the "Users" tab
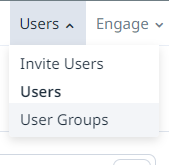
2. Click "Upload CSV"

3. Click "Download template"
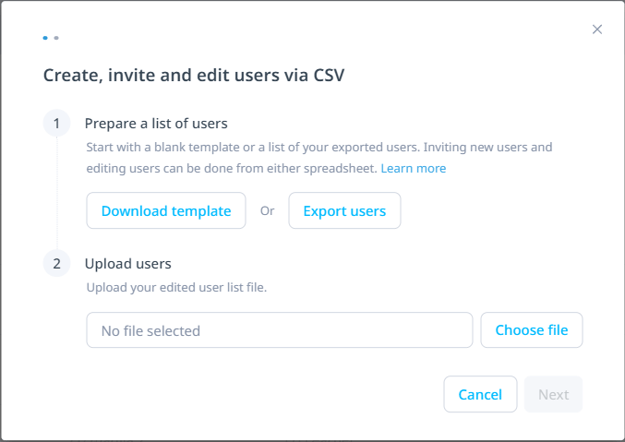
This downloads a blank template which you can use for uploading new users you'd like to invite to the platform via email.
The CSV file must be laid out in a specific way as indicated on this page in order for the data to be uploaded correctly. Within the CSV file, the columns should be titled as the information you would like to upload. The only required field is email, however, admins can also add the following fields if applicable:
- Username
- First name
- Last name
- Password
- External id
- User group
- Custom fields

You also have the option to choose 'Export users' CSV and add your new users to this file instead.
4. Click 'Choose file' to upload
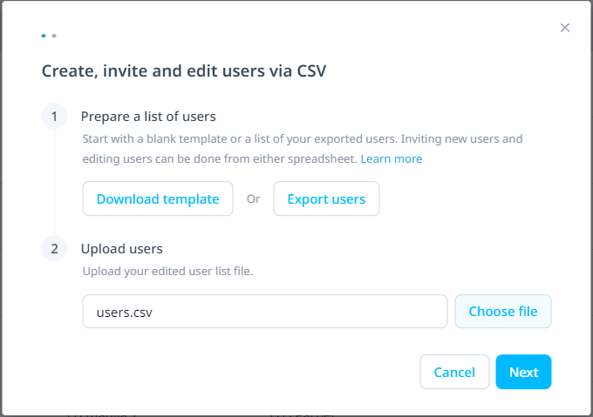
Once you have added the new users you would like to invite, click the choose file button and upload your CSV file. Then click Next.
5. Send invitations to new users
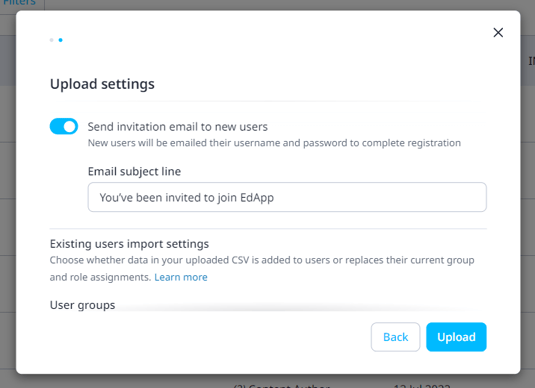
Toggle the "Send invitation email to new users" to on, which will send new users their username and password to complete registration. Existing users will not be sent invitations.
If this toggle is set to off, new users will be created but they will not be notified.
You also can customize the email subject line, making it specific to your organization and learners!
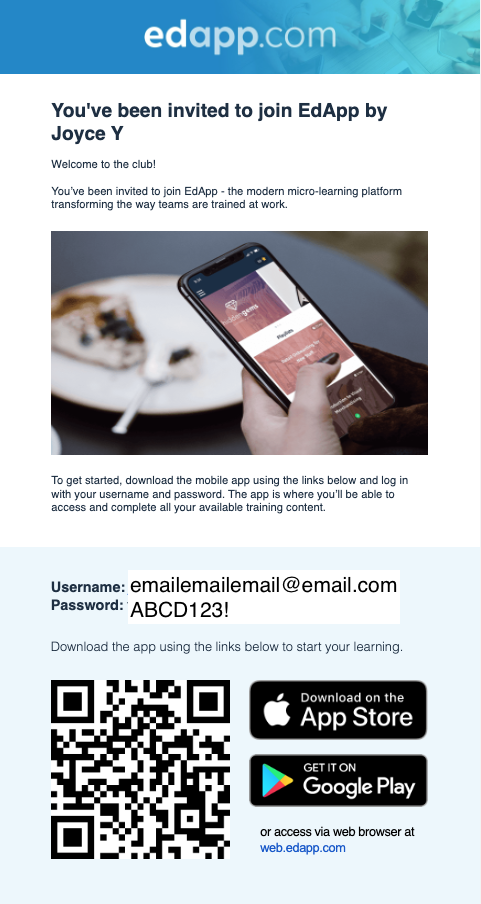
Learner's Welcome Email Example
Full customization
If you opt to send an invitation email, the learner will get a standard template from EdApp. You can fully customize the sign-up experience for the user by following the instructions below.
1. Create new users with Send invitation email toggle set to Off
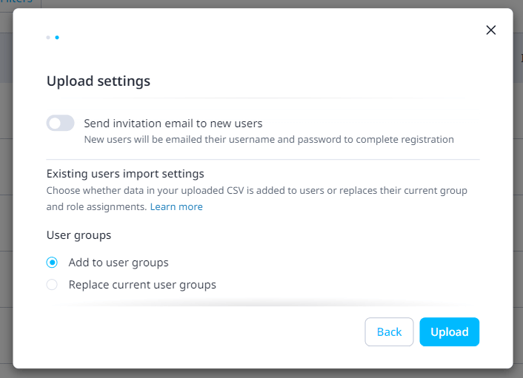
If this toggle is set to off, new users will be created but they will not be notified.
2. Send a fully customized email from your own provider
Create your own custom email from your own email provider. You can also customize your own email template using this outline we have created.
Be sure to include the username and password they are to sign in with. Here's an example below:
Hi John,
You've been invited to join EdApp to complete [course]. This is important because...
To get started:
1. download the mobile app through the Apple or Google Play Store, or scan the QR code.
2. login with your username and password provided below.
Username: sample.email@edapp.com
Password: ndWDu!2024
3. The app is where you’ll access and complete all your available training content.
This allows you to add your branding and flare, including your logo and any other information you might want to include!
Please note that you can only add users with emails that aren't registered with existing EdApp accounts yet. We only allow the association of one email address per EdApp platform/account. More about troubleshooting invites and registrations HERE.

