Paths in multiple languages will enable the distribution of content across several markets quickly and easily. This feature allows for a clean UI/UX experience for all learners by delivering courseware based on their device language settings.
If the learner has a device language that isn't configured the original version of the courses will show instead
We will discuss a couple of scenarios below on how to set up Paths in multiple languages.
This feature does not have automatic save, any changes you will need to save by clicking "save all changes" to the right of your screen
Adding a course to a Path that does not have any linked translations
This scenario will show you the steps to setting up a path when you are yet to have any linked translations for the original courses in the new Path.
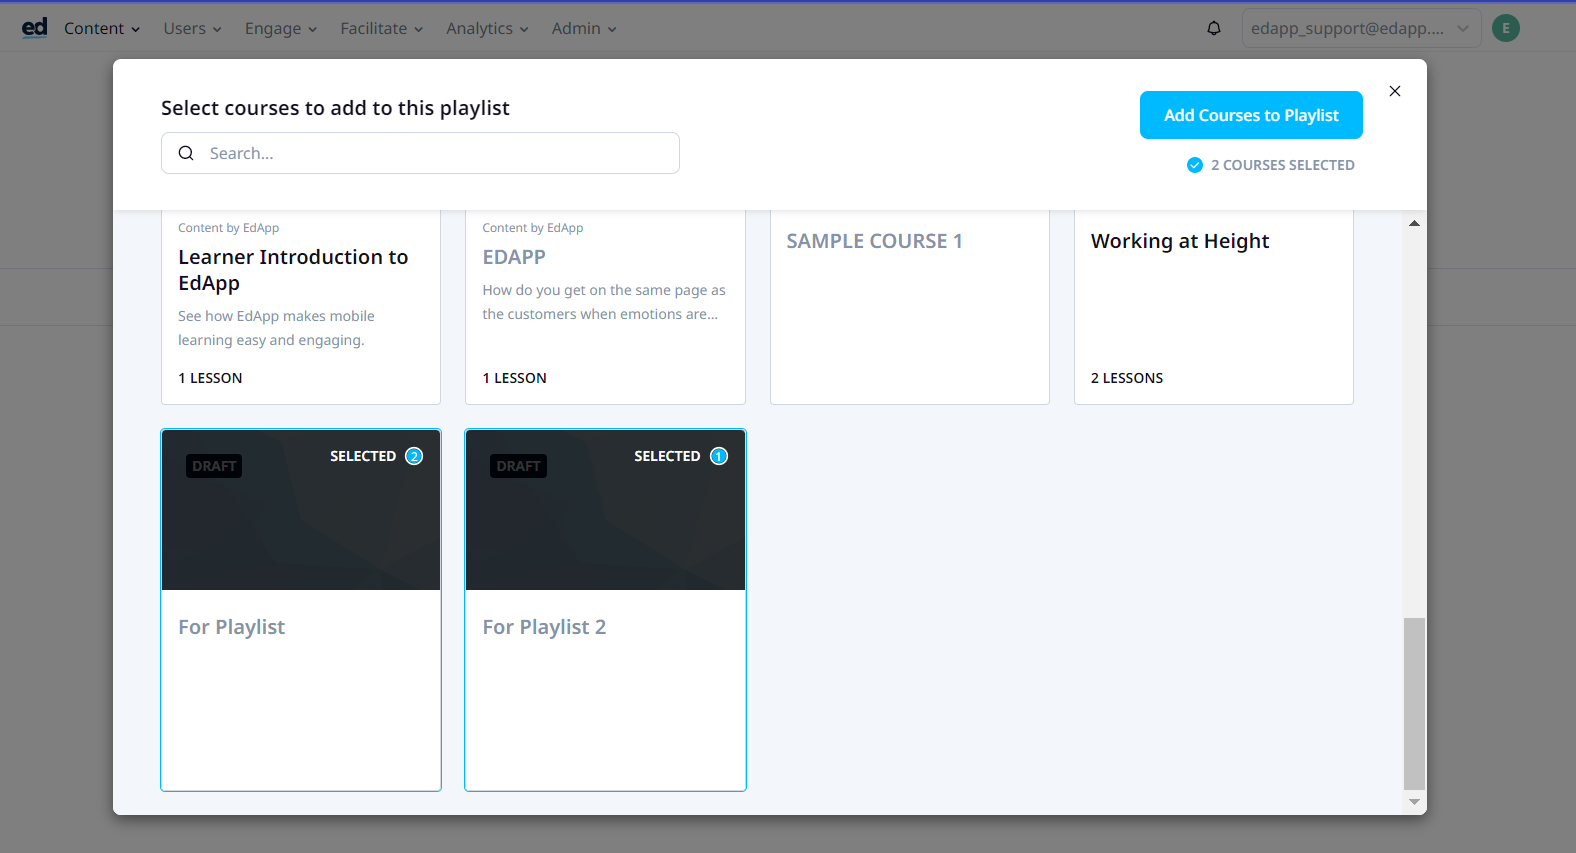
Step 1 - Add your courses
Head to the "Path" tab under the "courses" section
Add a new path, making sure you give it a title and description
Then you can click "Add courses to this path" this will open your course library for you to choose the courses you want to add to the path.
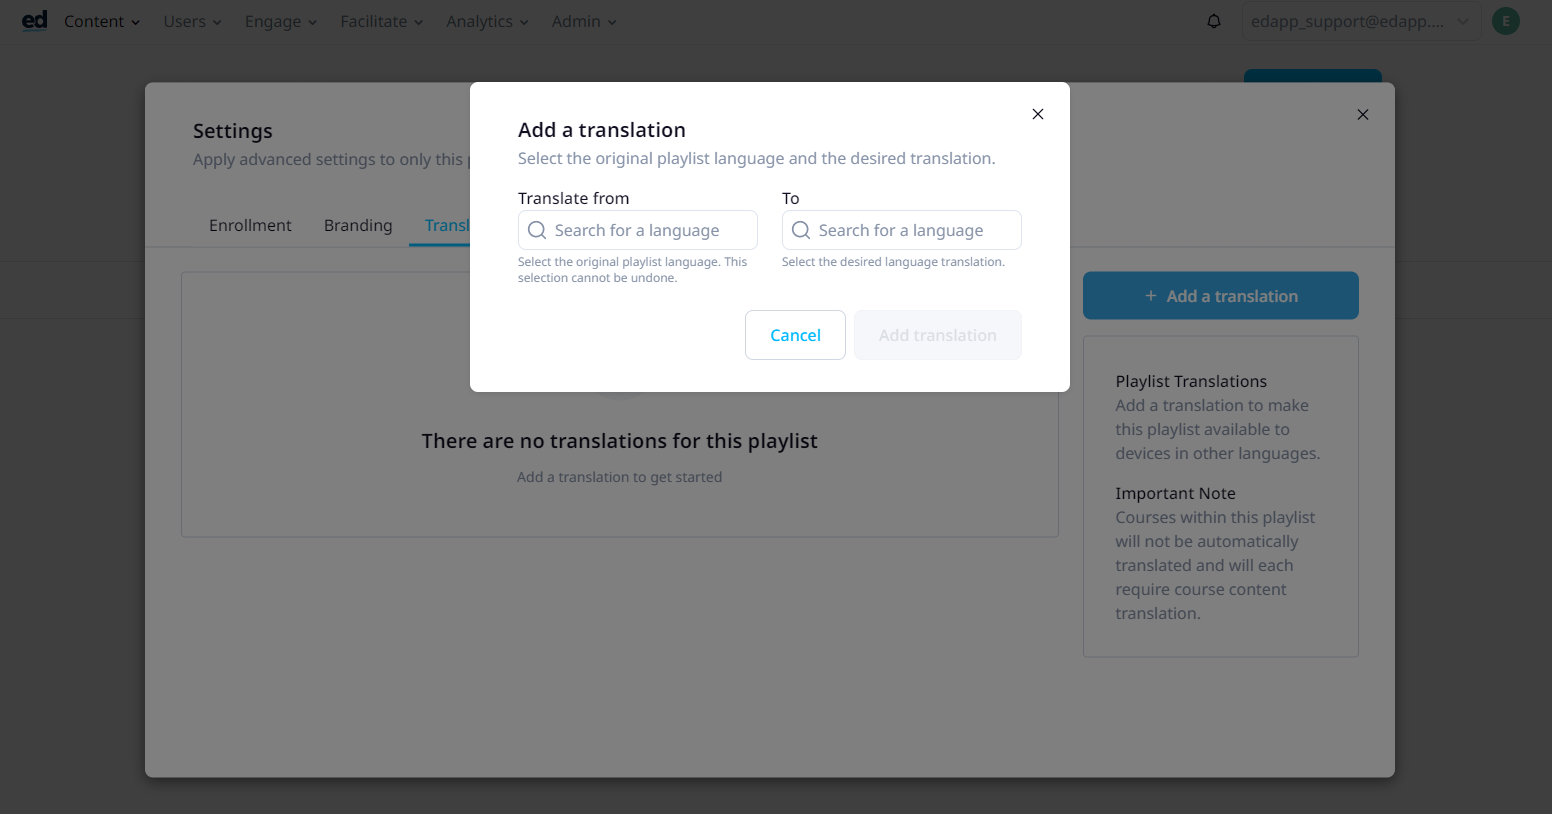
Step 2 - Add a translation
Navigate to the translations tab and click on "Add a translation"
If this is the first time you are translating a course you will need to pick the original course's language, then you can choose the language you want to have as the translation.
Translate from will only be required upon the first translation to specify the original language of the course. This is the version the user’s device would fall back on if there is not a translation of the path that matches the user’s device language.
If you have already chosen the original course's language then you will see this screen instead:
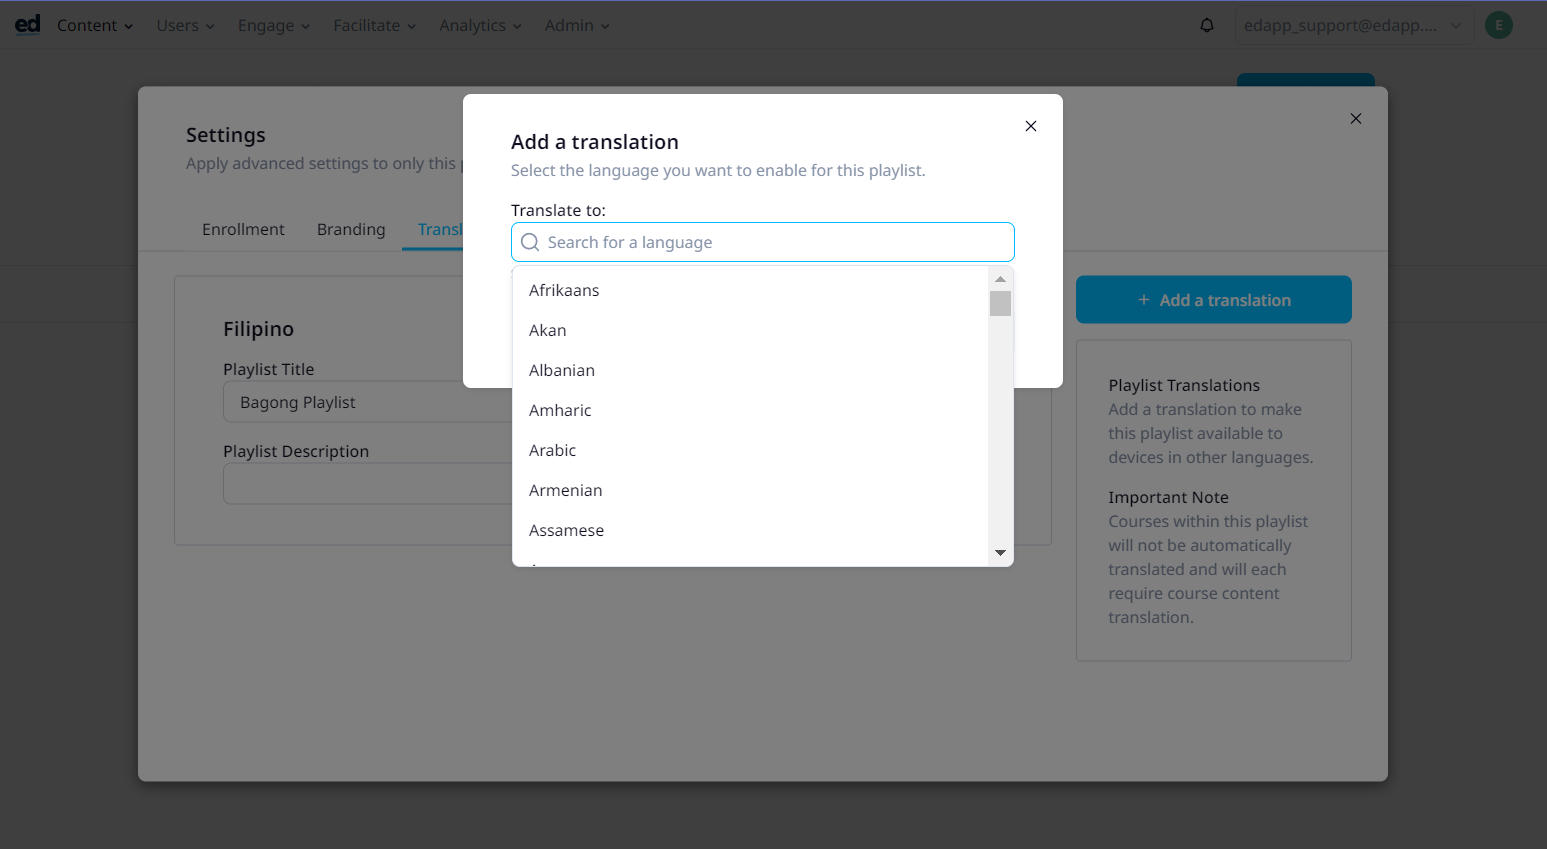
Once you have chosen your translation language you can then select "Add translation"
Step 3 - Check the configurations of your translation
Check the Path Title, Completion Message, and Path Description which are all editable fields. If one of these is not translated, this will be because the original version of the course is missing this element (for title and description) or the completion message hasn't been configured on the branding tab. Find out more about general Path configurations here.
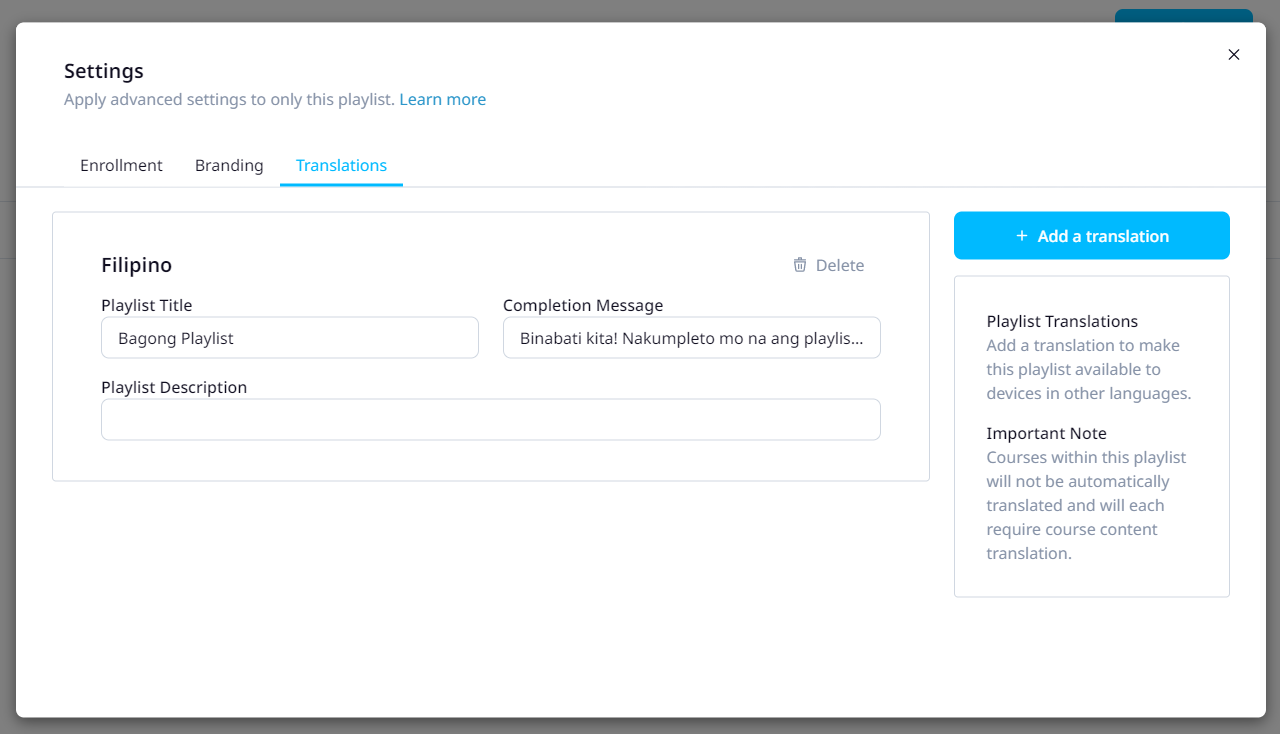
You can edit these specifically for this translated version of the course from this page. Otherwise, you will need to delete the translation that just was created and re-translate when you have updated the original version of the course or the branding tab on the path.
Step 4 - Identify the courses that need to be translated
On the 'translations tab' or the 'courses' tab an icon will indicate if there is a course that is missing a translation.
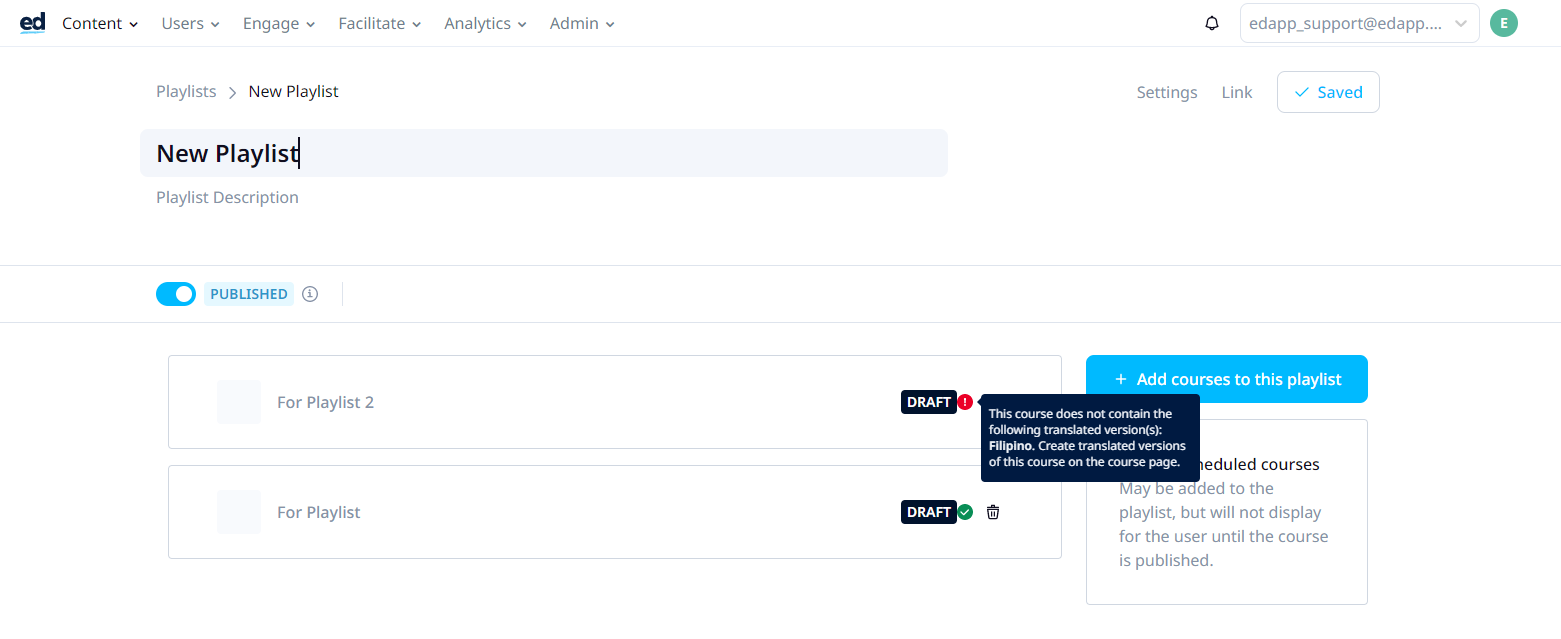
If you see this indicator you will need to head back to the original course and translate it into the relevant language, this can be done via the 'more' tab of the course. We have AI translation and manual translation available.
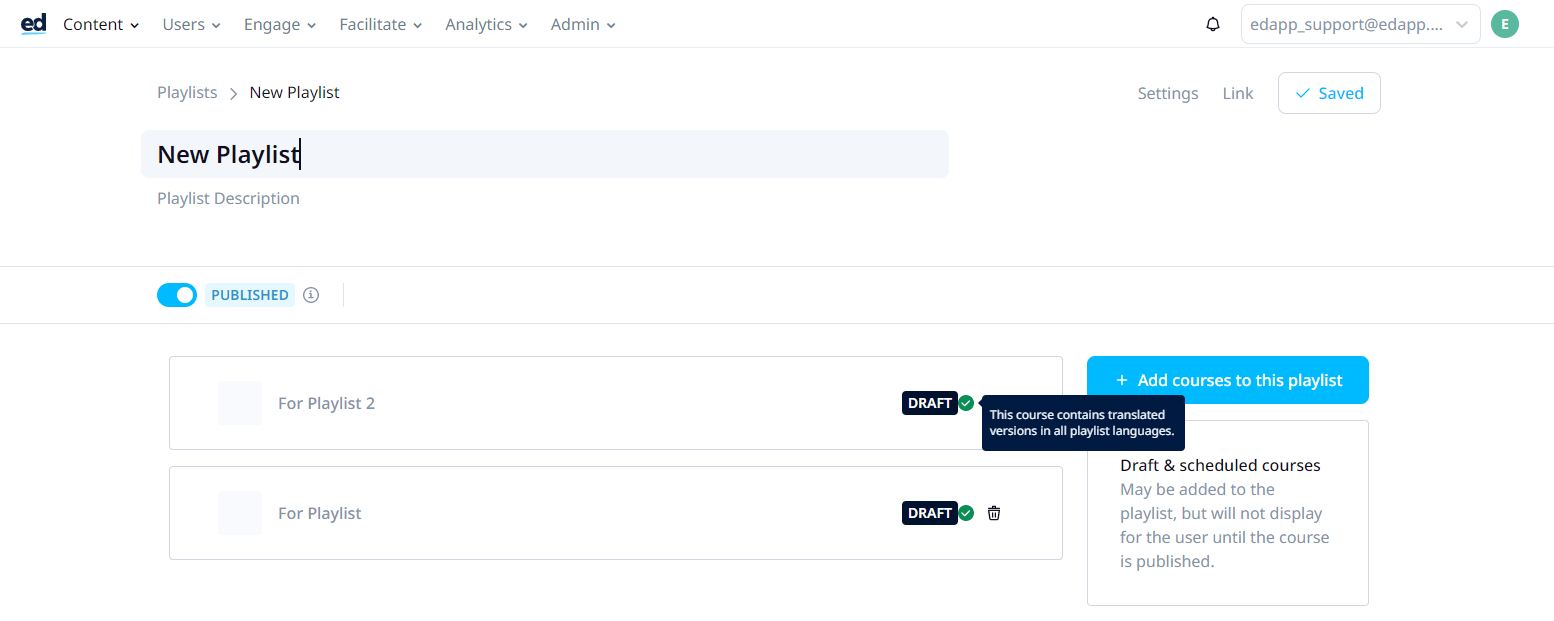
Once the translation of the course is complete, go back to the Path and confirm that the translations match. The red indicator will have turned green to confirm that this course contains the translated versions in all path languages.
Adding a course to a Path that does have linked translations
This scenario will show you the steps to setting up a path when you are yet to have any linked translations for the original courses in the new Path.
Step 1 - Add your courses
Head to the "Paths" tab under the "Courses" section
Add a new path, making sure you give it a title and description
Then you can click "Add courses to this path". This will open your course library for you to choose the courses you want to add to the path.
When you are adding your courses, you only see the original version of the course in the library, but don't worry the other linked translations are still there!
Step 2 - Add a translation
Navigate to the translations tab and click on "Add a translation"
If this is the first time you are translating a course you will need to pick the original course's language, then you can choose the language you want to have as the translation.
Translate from will only be required upon the first translation to specify the original language of the course. This is the version the user’s device would fall back on if there is not a translation of the path that matches the user’s device language.
If you have already chosen the original course's language then you will see this screen instead:
Once you have chosen your translation language you can then select "Add translation"
Step 3 - Check the configurations of your translation
Check the Path Title, Completion Message, and Path Description which are all editable fields. If one of these is not translated, this will be because the original version of the course is missing this element (for title and description) or the completion message hasn't been configured on the branding tab. Find out more about general Path configurations here.
You can edit these specifically for this translated version of the course from this page. Otherwise, you will need to delete the translation that just was created and re-translate when you have updated the original version of the course or the branding tab on the path.
Step 4 - Identify the translated paths
Check the 'courses' and 'translations' pages to make sure that you see the green tick that identifies all the courses in the path are translated
If a learner's device language is supported in the path translations, they will see the path that matches their device language. If it doesn't match a supported path language they will see the original version of the courses instead.