As an Admin on EdApp, you can create individual users. This post covers how to set up individual users.
- Log in to LMS (https://admin.edapp.com/login)
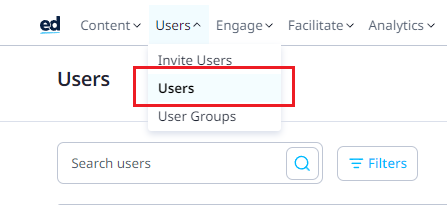
- From the dashboard select the ‘Users’ option in the menu bar.
- Select the ‘Users’ option. It is the second option on the list.
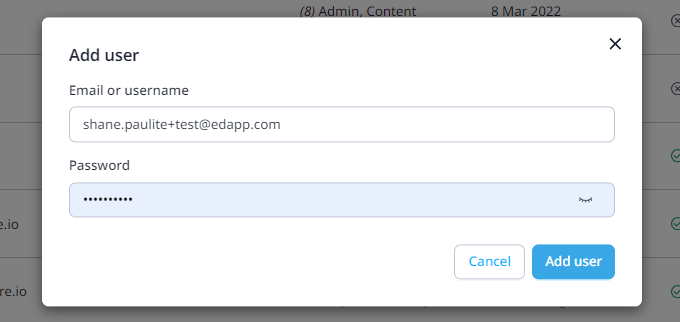
4. Once on the 'Users' page click on the 'Create user' button on the right-hand side.

- Set up the user's Username and Password
5. You need to input the username of the new user (usually an email address) and a password. To check our password requirements, click here.
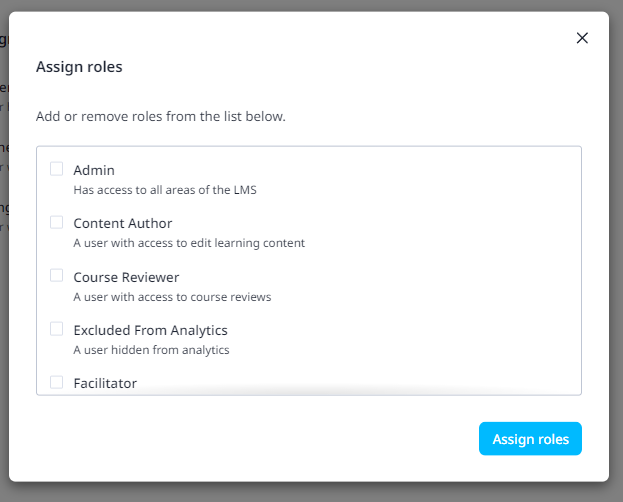
- Set up the user's Roles and Permissions
6. Select the permissions you would like them to have in the roles section. To read more about the various permissions available on EdApp visit here.

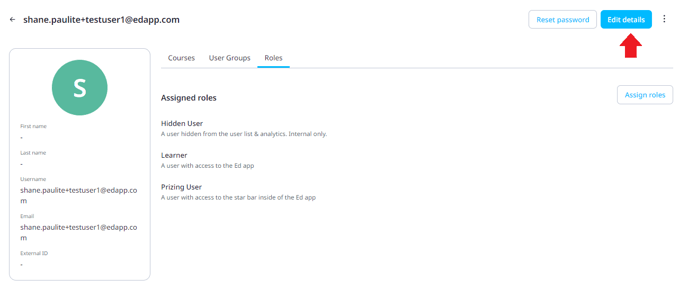
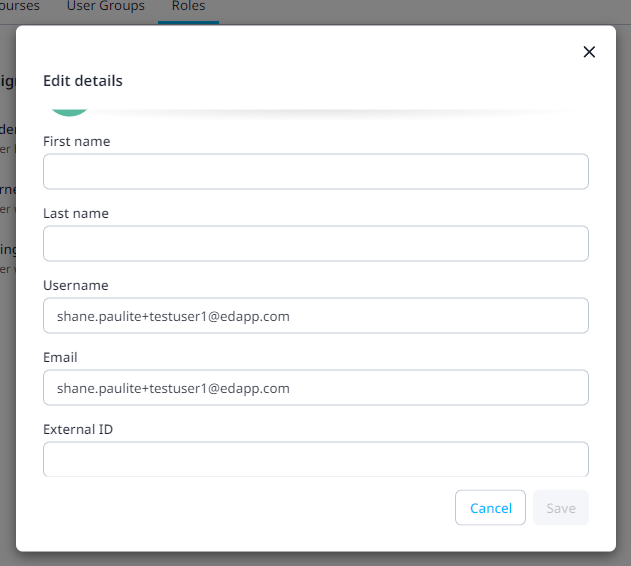
- Set up the user's Information
8. Edit the user's information (First Name, Last Name, Email, Username, External ID and other custom fields that you've set on App Settings) through the Edit Details button.
- Set up the user's Usergroups
9. From the User Groups section, you can assign them to the group they should belong to, as well as assign them the user groups they're going to manage if they have the manager role/user groups they're going to facilitate if they have the Facilitator role.
The user group feature is only available if you're subscribed to any paid plan. See more about our pricing here: https://www.edapp.com/pricing/

You have just successfully created an individual user!
*Useful to note – if the new user is intended to have extended permissions (e.g. reviewer) they should be created as a learner initially, then Admins can assign the permissions later in the process.