Welcome to your EdApp launch journey! Throughout this article, we will highlight key steps and milestones you should be following, as well as pointing you towards more great resources.
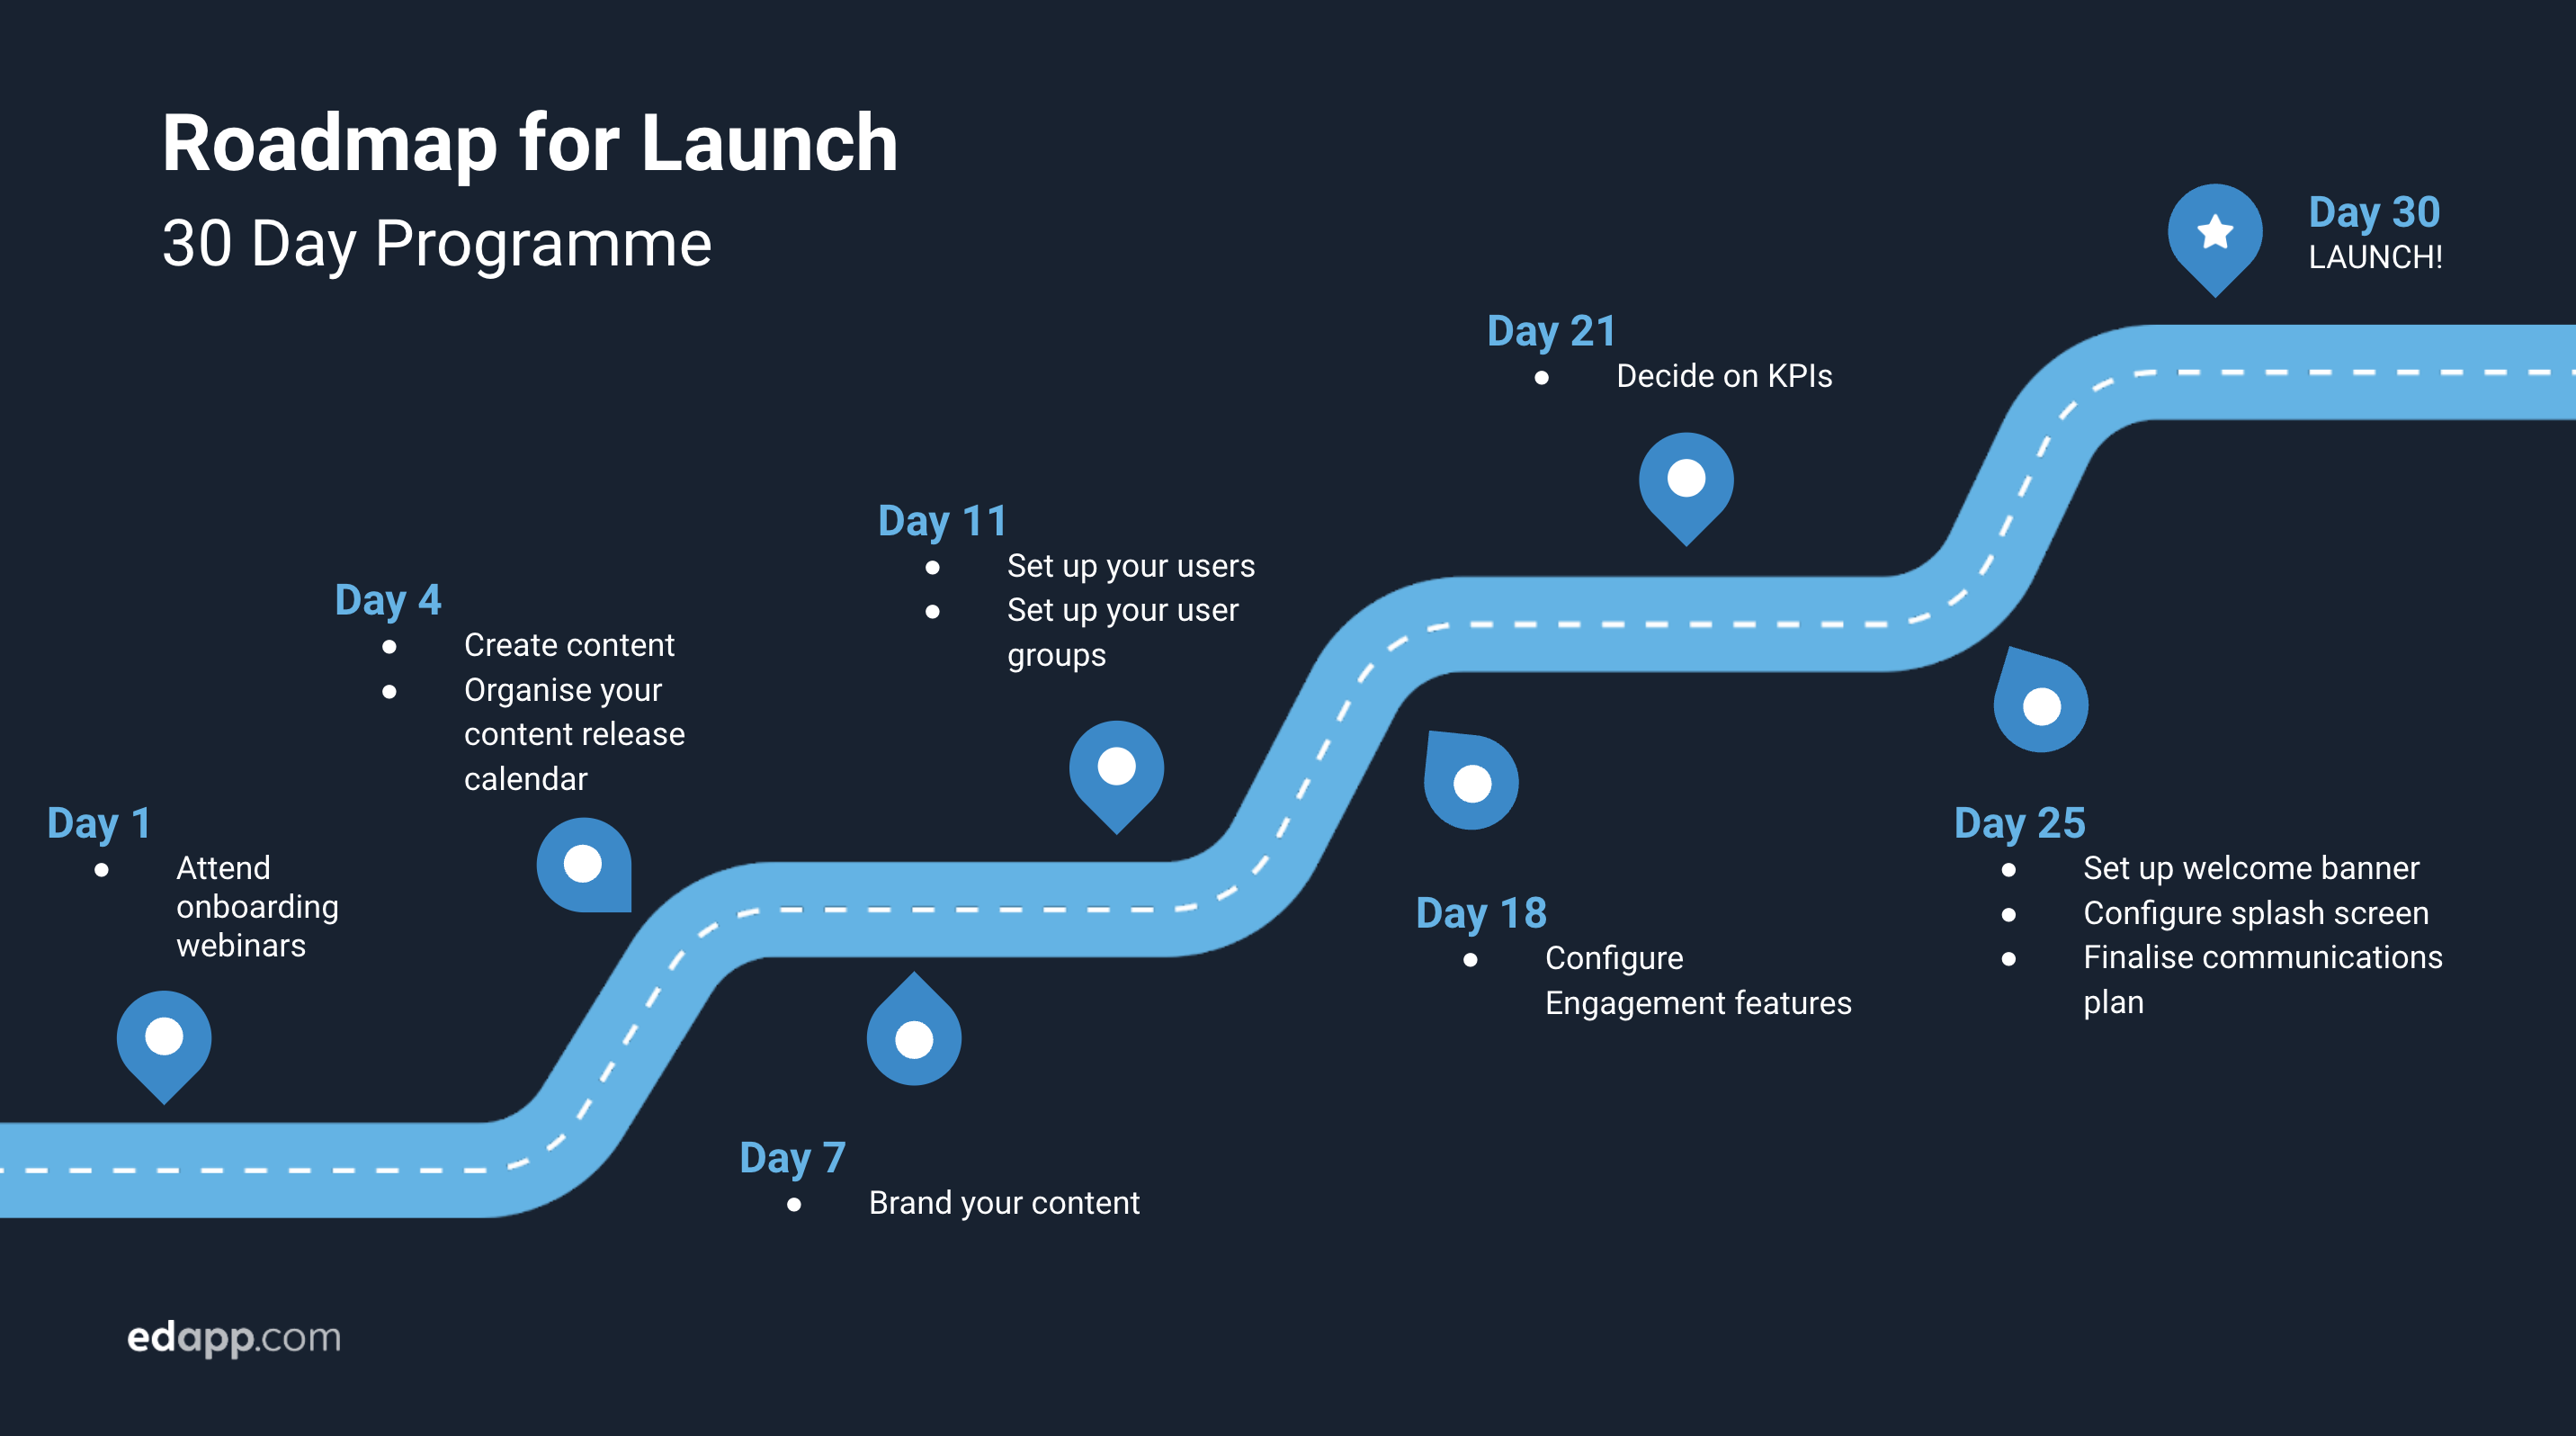
Step 1 (Day 1): Attending our onboarding webinar series
Step 4 (Day 11): User Management
Step 6 (Day 21): Measuring Success
Step 7 (Day 25): Let's add the final touches
Step 1 (Day 1): Attending our onboarding webinar series
We have created a three part onboarding series to up-skill you on the must-know elements of EdApp:
Authoring - 45 minutes, Mondays for America and Europe (10.30 EST/ 15.30 GMT/ 16.30 CET), Wednesdays for Asia Pacific (14.00 AEST) - click here to sign up.If you can’t make the session, you can watch the recording by clicking here.
User and Content Management - 30 minutes, Wednesdays for America and Europe (10.30 EST/ 15.30 GMT/ 16.30 CET) Wednesdays for Asia Pacific (14.00 AEST) - click here to sign up.
If you can’t make the session, you can watch the recording by clicking here.
Engagement and Analytics - 45 minutes, Thursdays for America and Europe (10.30 EST/ 15.30 GMT/ 16.30 CET) Thursdays for Asia Pacific (14.00 AEST) - click here to sign up.
If you can’t make the session, you can watch the recording by clicking here.
Step 2 (Day 4): Content
Now we are on Day 4, the focus for you moving forward should now be on content.
We recommend 1-2 courses for launch, and a course that is very successful for many clients is “User Introduction to EdApp” which can be found in the content library
Here are some options for getting content ready for your learners:
- Choose a course from our content library. We add around 20 courses per month, so there is always a lot to choose from. Here is a guide on importing from the library.
You can also follow this guide to learn how best to brand this content in line with your company’s brand identity.
- Upload your PowerPoint to be converted to an EdApp course. Check out this article for how to do this.
- Create a course from scratch. Get those creative juices flowing by jumping into the authoring tool to start your course masterpiece with a blank canvas. Here is a guide to get you going, including a great instructional video from our Lead Instructional Designer, Sam.
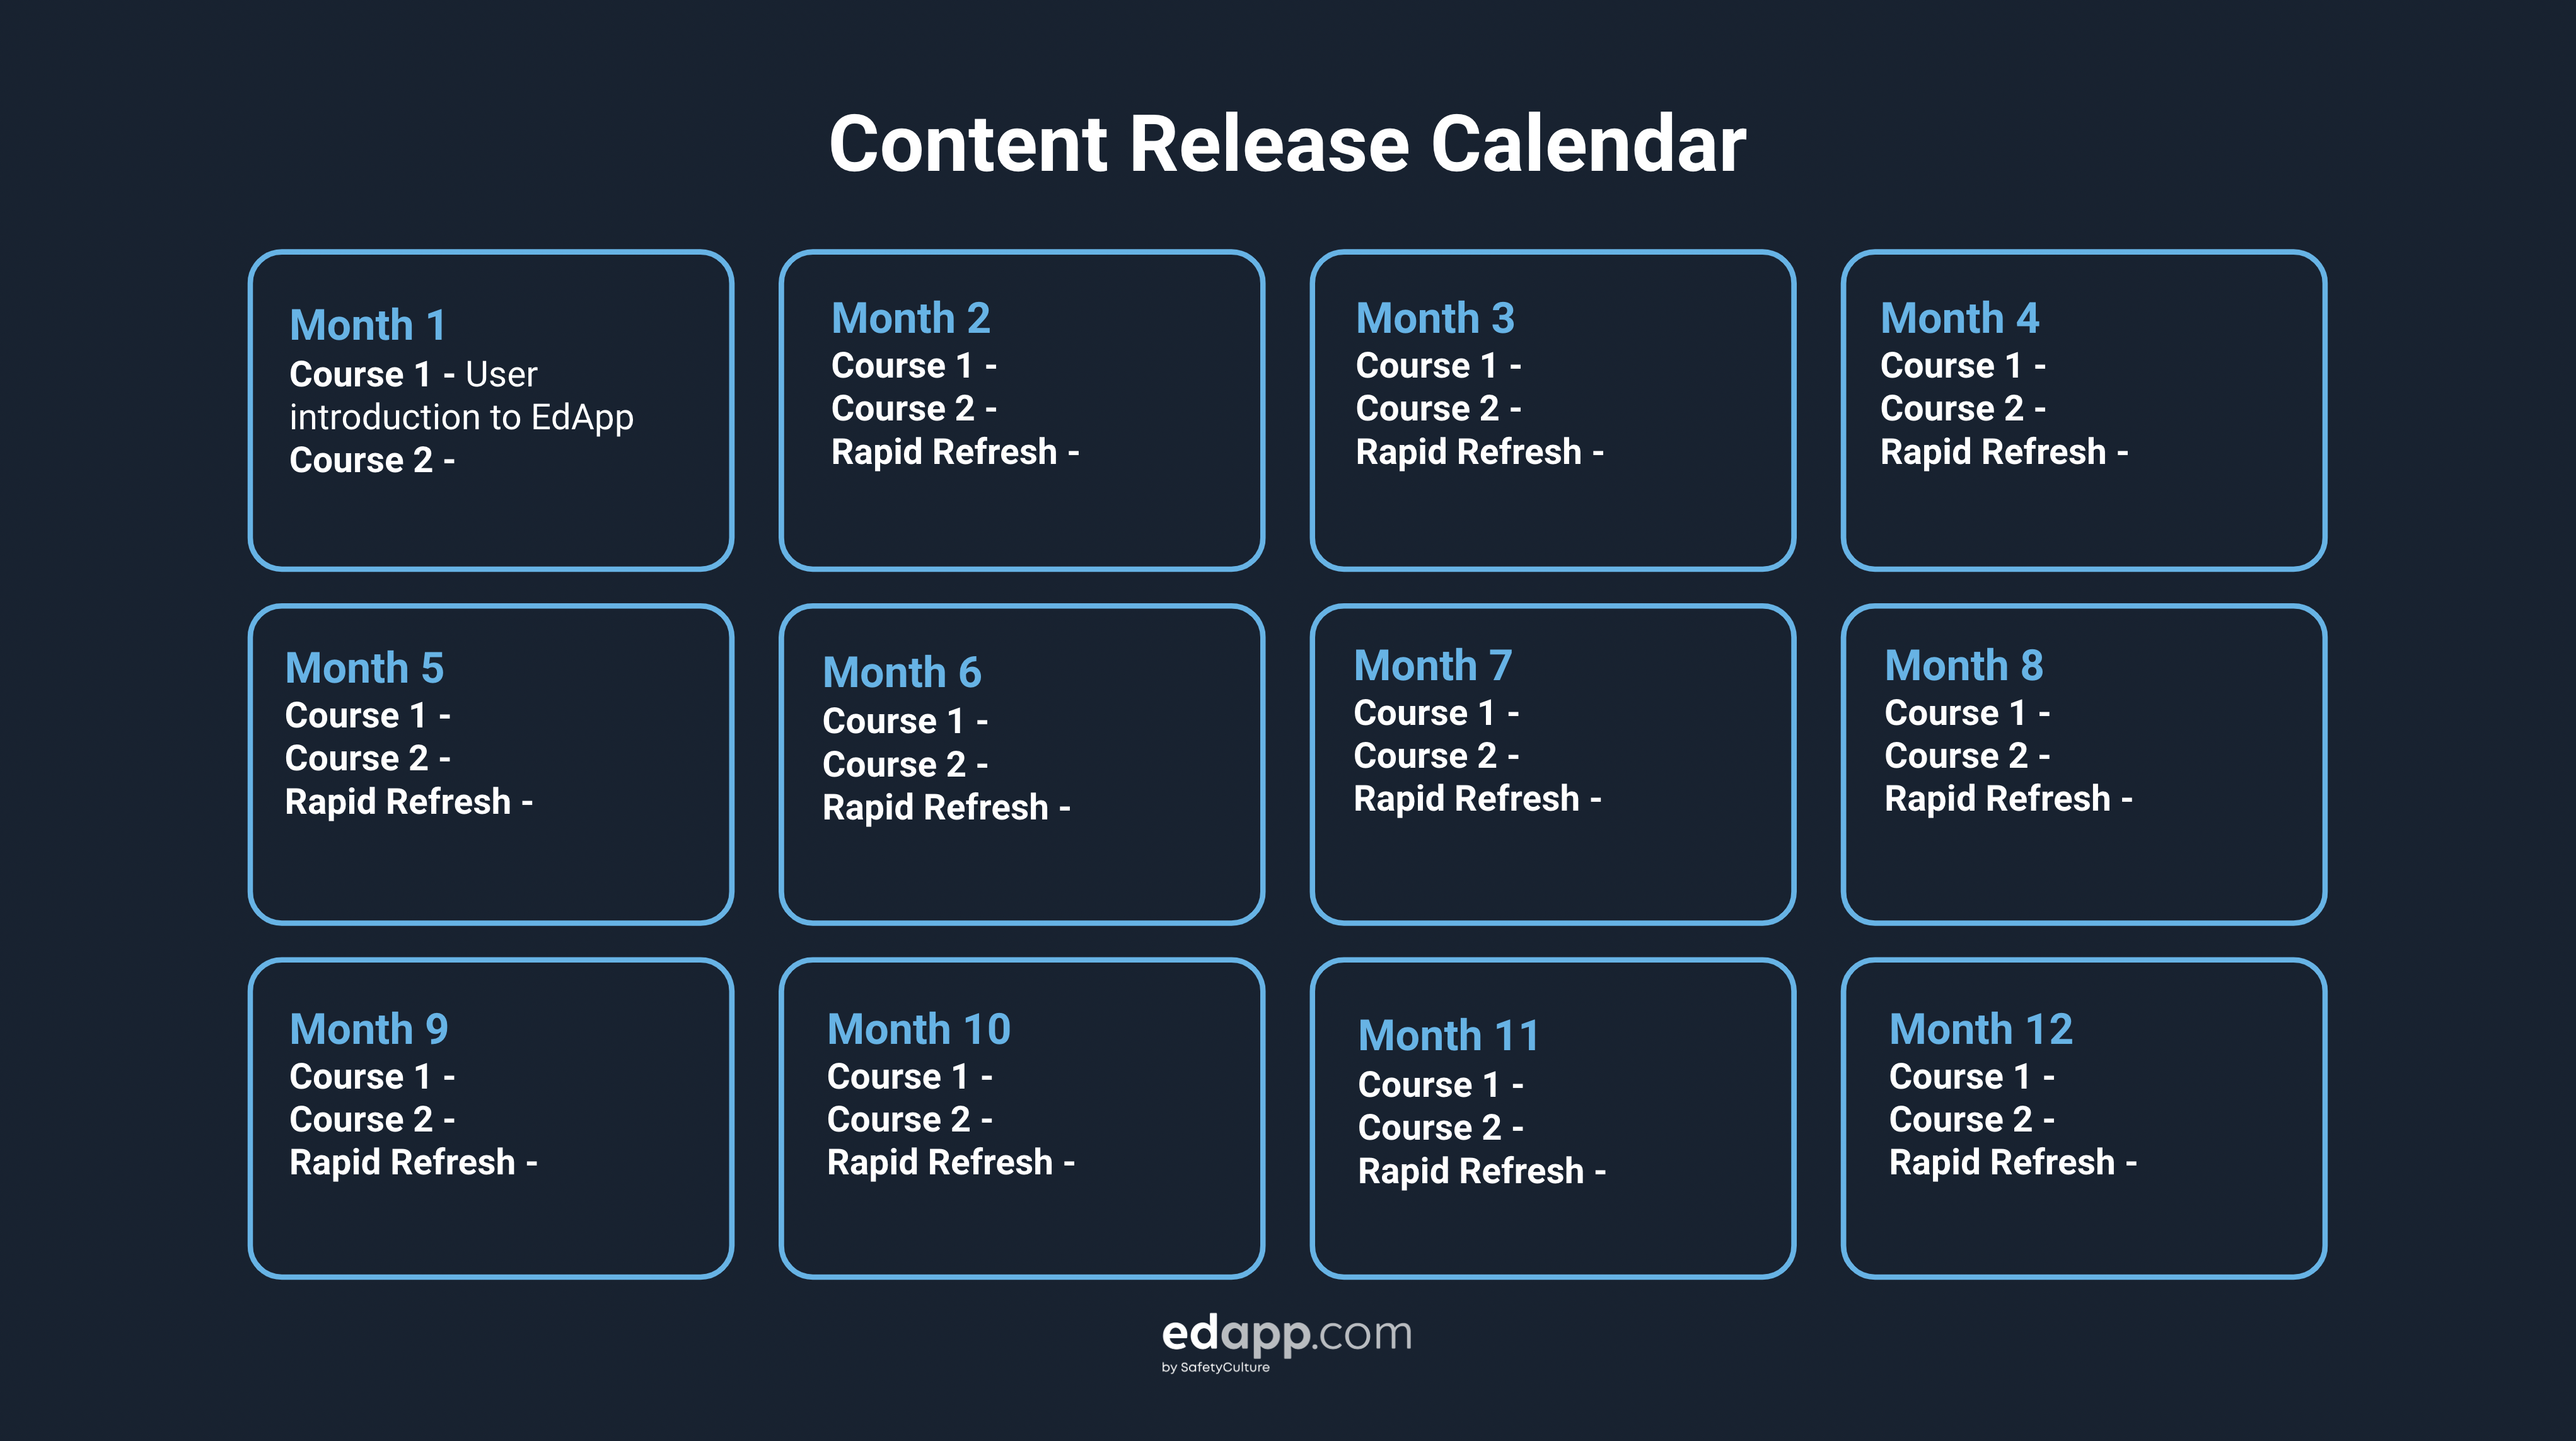
The key to a successful learning program is having enough content to keep your learners coming back for more. A really useful tool to plan and track content is through a content calendar, which you can find below:
Here is a helpful video from our Lead Instructional Designer, Sam, about Setting up your course structure
Also, check the below video out to learn more about creating your lessons
Webinar - Top 3 tips to creating beautiful training
Step 3 (Day 7): Branding
1 week down, 3 weeks to go till launch! You should be becoming a master of our platform since attending the onboarding webinars.
In the last section, we discussed a bit about the theme/brand of your content. You can do some basic markdowns on the authoring tool to make the font larger, smaller, bold, italic etc. To learn more about this, click on this guide.
Optionally, we use CSS (cascading style sheets) on EdApp to help accentuate the theme feel. Here is a guide to give you an overview of CSS and here is a CSS cheat sheet.
Other great articles we have on branding include:
- How to brand effectively
- Canva button
- Global CSS and Logo - allows you to configure CSS and a logo in the app settings, which will then apply to all content
We also have some awesome instructional videos on branding below:
Branding your courses
Webinar - Advanced Styling with CSS
Step 4 (Day 11): User Management
We are now at the Day 11 mark, by now, content should be well underway. The focus of this section is around user management, specifically getting users on the platform and sorting your user groups.
There are a few ways to get your learners onto the platform:
- Invite links/ QR codes - share a simple link or QR code with your learners. These can also be tied with user groups if you want to correlate them with your internal segmentation. Check out this guide.
- Bulk upload - you can upload your learners in a csv document and choose to email them an invitation through our system or separately yourself - click here for a guide.
- Single Sign On - this is usually done as part of an integration with an Identity Provider and allows your learners to log in to multiple systems with one set of credentials. It could be worth sending this guide on to your IT team if you are interested in setting SSO up.
Now let's look at user groups. These are a way to segment learners for content assignment, but also for analytical purposes. Here is a guide to set up a user group, but you can also use user group collections to create a hierarchical group structure in your instance.
Let's take a look at a worked example:
Below is an Excel sheet with my user information
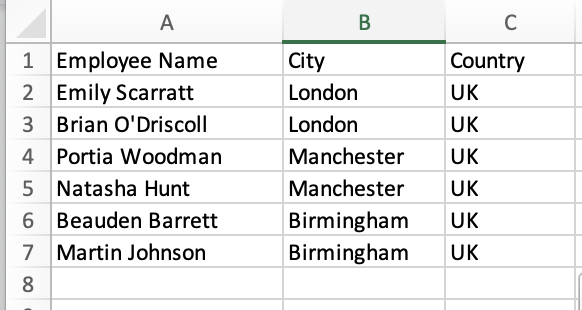
I would like to group these learners firstly by city, but then may have some content for everyone in the UK or would like to report on the UK level.
I would create 3 user groups:
1. London
2. Manchester
3. Birmingham
Then I would create 1 user group collection for UK and add all of these user groups into it.
Creating hierarchies within your account can make reporting and content assignment much more efficient.
Step 5 (Day 18): Engagement
Engagement should be one of the key drivers of your learning program and is often a measured KPI in many companies. It is the element that brings your learners back and creates a learning habit and culture in your organisation.
We have some really cool features you can learn about, and we usually recommend having 2-3 of these ready to go for launch:
- Leaderboards - learners can earn scores on lessons and go head-to-head in competitions
- Banners - highlight key messages for learners at the top of their app, e.g. teaser of new content. Click here to access our editable banner templates
- Achievements - reward learners for reaching milestones in their learning journey.
- Rapid Refresh - looking for a quiz to test learner retention or knowledge levels? Then this is the feature for you.
- Brain Boost - customised questions for your learners to increase retention and the best part, the feature is automated and pretty much runs itself!
- Star Bar - learners can spend their stars to play mini-games in the star bar and win real prizes uploaded by you onto the system.
We also have some great peer to peer engagement features for you to explore to become part of your courseware as blended learning:
Check out the videos below to hear from the EdApp team on how to utilise our engagement features:
Webinar - Boost your training engagement in 3 easy steps
Rapid Refresh
Brain Boost
Step 6 (Day 21): Measuring Success
3 weeks down, 1 to go!
KPIs are key performance indicators that make it easy to report back on the success of your learning program. You can check out this article for some common KPIs we see across the many customers we have using EdApp. KPIs should be reviewed on a regular basis to ensure your program is always striving for excellence.
You can also look into using the manager role to give autonomy to your organisation’s leaders to follow up with their own teams. This may even become part of the management team's KPIs as well!
To learn more about our analytics suite, you can visit this area of our support site.
Step 7 (Day 25): Let's add the final touches
5 days to go, and you should be close to being able to launch!
Content ✅
Users ✅
User Groups ✅
Engagement ✅
KPIs ✅
The last step is launch communications. We have devised a full proof launch pack to help you ensure you are clear and concise with your communications.
Click on the links below to access all the assets and advice on how to:
- Set up a welcome banner - this will be the first thing a learner sees on their course's page–you can even use some of our pre-made templates.
- Configure a splash screen - add an extra layer of branding to the app for your organisation.
- Create user guides - click here to access customisable user guides to send to your learners.
- Email template examples - check out this guide on the most effective emails to send your learners to get them up and running on the platform.
- Communications schedule - here you will see our tried and tested communications schedule for maximum utilisation.
- Communications plan - Some tips and tricks for a communications plan if you are looking for a holistic overview.
Step 8 (Day 30): Launch!
The time has arrived–we are ready for launch! Congratulations, you are now officially an EdApp Master, ready to spread your learning passion across your organisation.
Let’s cover off your launch checklist to make sure you are all ready to go
Content ✅
Users ✅
User Groups ✅
Engagement ✅
KPIs ✅
Communications ✅
User guides ✅
Remember, you can always see our more in depth checklist for launch if you like.
Here are some useful top tips on troubleshooting, just in case you need them.